Wrap Skirt finishing the belt and adding a buttonhole

Sewing Circle

To finish the belt on your wrap skirt you have two options.

  1. Stitch in the ditch. This is stitching directly into the joining seam. Press under 1/4″ on the layer of the belt that has not yet been secured. Because you stitched 3/8″ on the belt ends, you will have to tapper to 3/8″ as you get close to the edges of the skirt. Then stitch in the ditch to secure the inside layer of the belt.
  2. Top Stitch. Press under 3/8″ on the layer of the belt that has not yet been secured. Then stitch close to the seam that joins the belt to the skirt on the belt side. This will secure the inside layer of the belt. Remember to back stitch at the beginning and end of the top stitching.If you have a top stitching guide foot, or a stitch in the ditch guide foot that will be really useful for this step. Here are some examples of what that might look like.
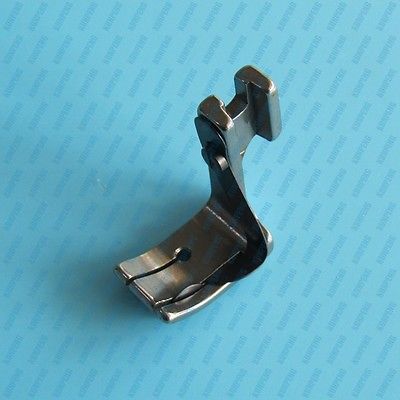
    Top Stitching guide foot
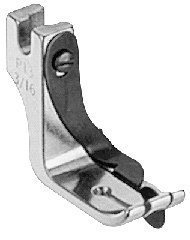
    Top Stitching guide foot

    Top Stitching Guide foot for Sewing machine
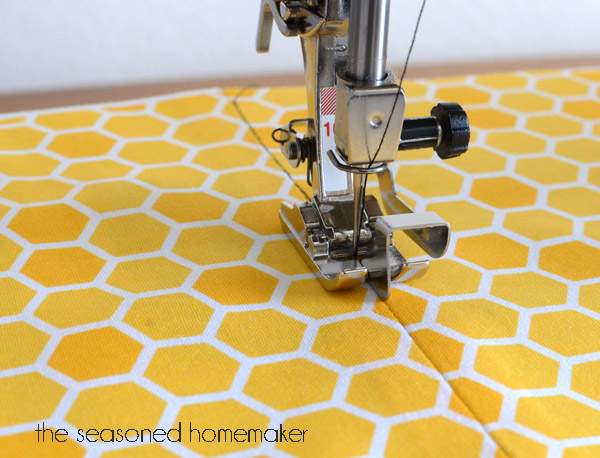
    Top Stitching Guide foot

    Stitching in the ditch guide foot for sewing machine

    Stitching in the ditch guide foot

    The guide fin goes in the seam as you are sewing, so if the fin is in the same place as the needle opening, then it is a stitch in the ditch guide foot, but if the guide fin is off to one side of the needle opening, then it is a top stitching guide foot.


    Feet are not very expensive and they make many tasks much easier, so I highly recommend investing in feet as you advance.

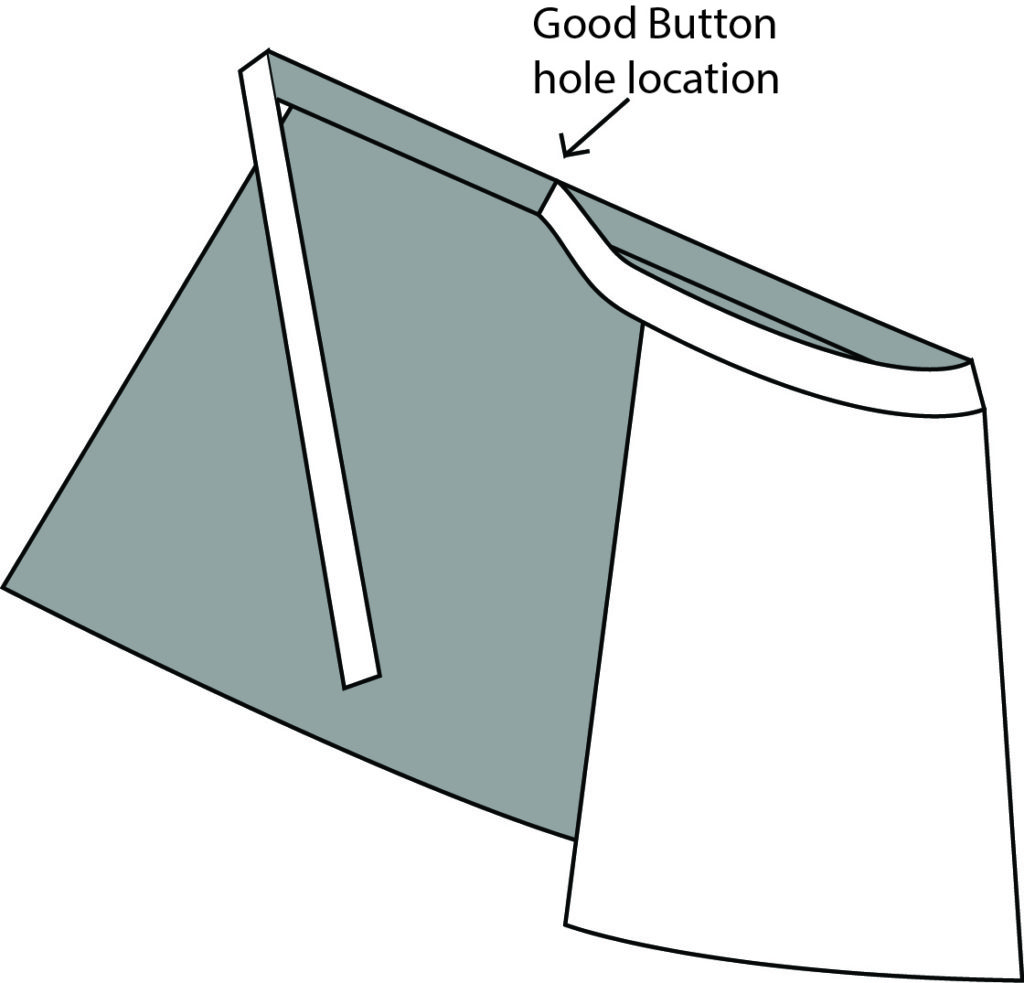
    Now it is time to add the button hole. I have not marked where the button hole should fall on the pattern, because this can vary from person to person.

    First decide which side you want to belt to emerge from. This is up to you although most warp skirts wrap right side over left side, so the belt emerges on the right side as well.

Once you have decided what direction to wrap the skirt you will want to put the skirt on and wrap it tight, then mark the button hole at least 3″ away from where the underside of the skirt meets the top layer. You want to give yourself a little wiggle room. You can use tailor’s chalk to mark it, or just put a pin where you want to place the button hole.
 

Actually sewing the buttonhole will depend on your particular machine. Since a lot of the girls in the sewing circle have Singers I have linked to a youtube video showing how to do a 4 step buttonhole on a Singer machine. Make sure you have a foot on your machine that is either specifically for a buttonhole or that has enough room for the movement of the needle side to side. If your foot looks like this, then when the needle starts moving side to side to create the buttonhole, it is going to hit the foot and break.You need to have a foot that has an opening that allows the needle to move back and forth.
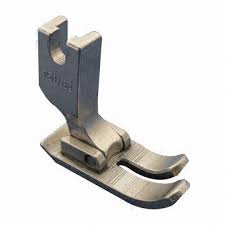
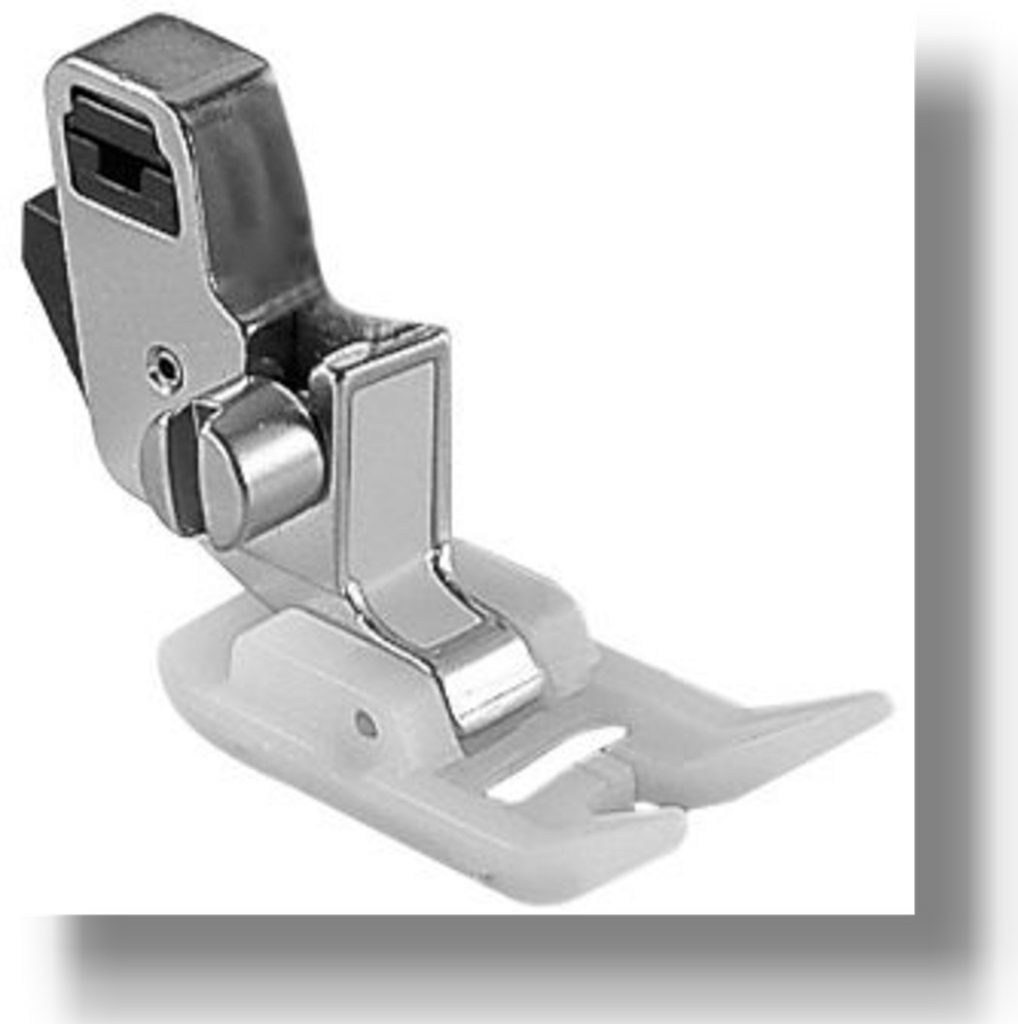
Like this one. This is not a buttonhole foot, but it has a large enough opening that it would work if you do not have a buttonhole foot. You want to make the buttonhole as long as possible, but keep it on the belt and leave about 1/8″ at the top and bottom.
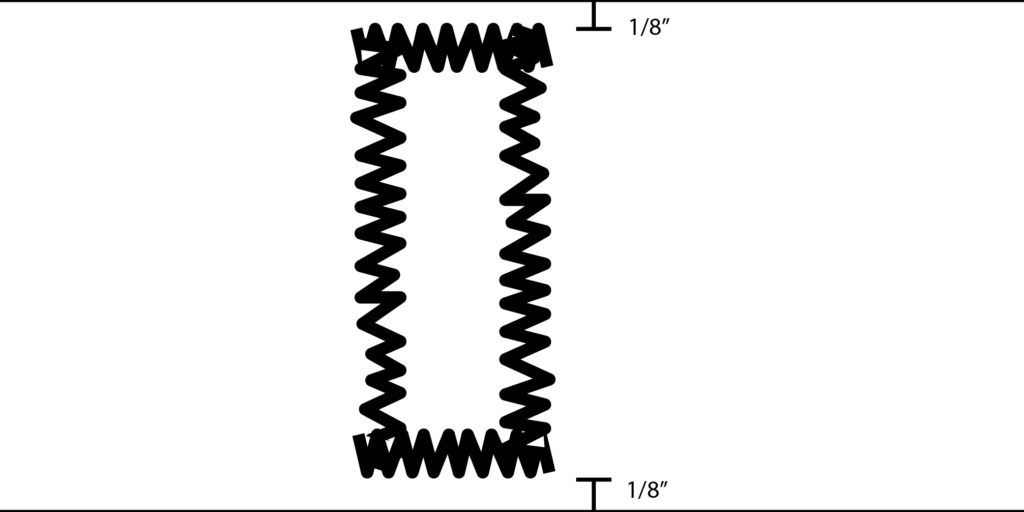
After you have stitched the button hole you will need to open it. My favorite way to do this is the fold the button hole in half and use scissors to cut a small hole in the middle of the button hole. Then I unfold the fabric and stick my scissors through the small hole that I cut in the middle and cut the buttonhole the rest of the way open on either side. This is a video showing how you can open button holes with a seam ripper. She does not do this in the video but I would recommend putting a pin at the end of your buttonhole to make sure that you don’t accidentally cut through the end of your buttonhole. https://youtu.be/vnBTLIS2Nz8?t=10s

Wrap skirt continued….

Sewing Circle

Now that you have the belt pieces together and the interfacing added, you can set that aside for the time being and focus on getting the skirt ready.

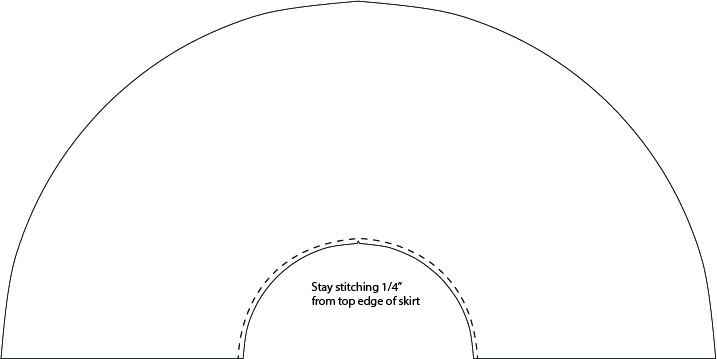
First you want to add stay stitching to the top of your skirt to prevent it from stretching out. This is just a row of stitching 1/4″ from the raw edge at the top of the skirt. 

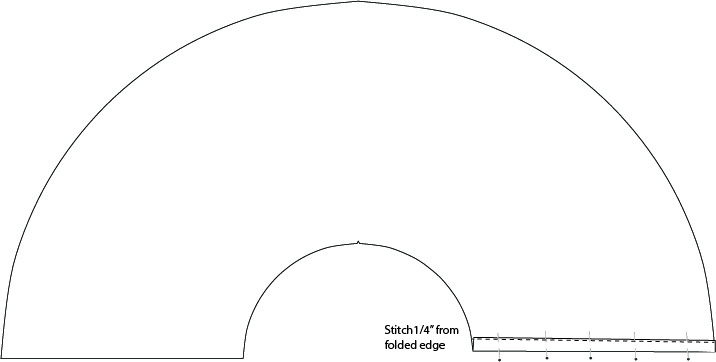
Next you will finish the sides of the skirt by folding the raw edge over 1/4″ and then again 3/8″ so that the raw edge is completely enclosed. Then stitch 1/4″ from the folded edge to secure the side hem in place. 


Take the pins out before you sew over them.

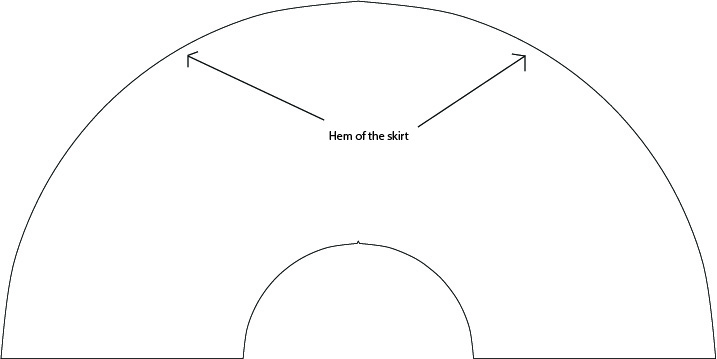
Then repeat this process again on the hem of the skirt. The hem will be harder because it is a curve and you are folding a larger circle into a smaller circle. Use your iron and steam to help ease the extra material into the smaller area. Use glass head pins so that you can iron on top of them without melting the head. 

Another nice trick to help you have a crisp look is to add a few hand stitches to the edge/end of the hem to keep the excess from spilling out on the edges. Use a contrasting color so that you can easily see these stitches. This will make it easier to take them out after you have machine sewn the hem.

Next is to attach the belt. The notches that are on the belt pattern will line up with the center notch on the skirt. The two sides of the belt will not be even because I have designed this skirt to tie on the side of the hip instead of the back. If you plan to tie your belt in the back then ignore these notches and you can position the belt to have an even amount of tie on either side of the skirt.

First press the entire belt in half. Then lay the belt face down on the skirt, lining up one raw edge of the belt with the raw edge of the top of the skirt. Sew only one layer of the belt to the top of the skirt using 3/8″ seam allowance.


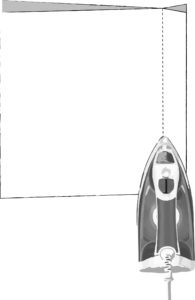
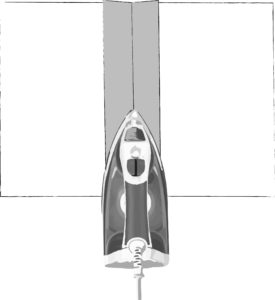
The next step can be a little confusing, so I’ve added step by step illustrations that hopefully will help. In order to finish the ends of the belt, you are going to flip the fold on the belt around so that the raw edges of the belt meet and the fabric is face to face or right side to right side.


Sew the ends and the long side of the belt using 3/8″ seam allowance and come as close as you can to the stitching that joins the skirt to the belt without actually sewing onto the skirt. Make sure not to take more than 3/8″ seam allowance. If you take more then the belt will be narrow and it will be harder to turn right side out.


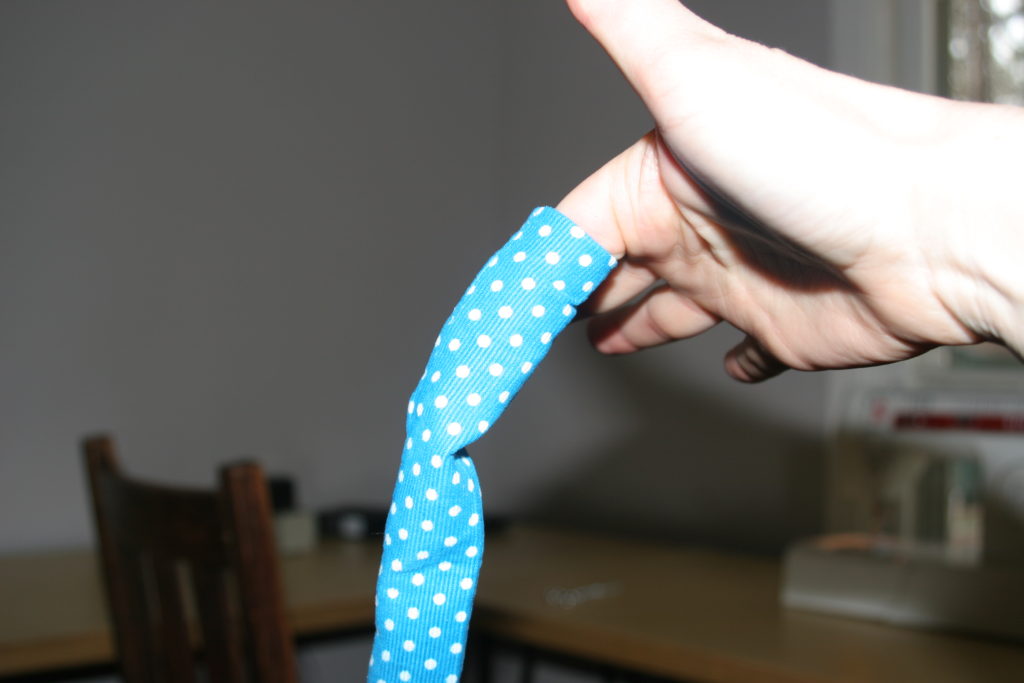
Now you can flip the ends of the belt and press them flat. Once you get started flipping the ends of the belt, you can stick your finger down into the cone and use the friction of you finger to pull the material through. 

Once you have the ends turned right side out, you can use a chop stick to get the corners looking crisp.

Wrap Skirt cont….

Sewing Circle

Once you have all your pieces cut out, find all your belt pieces and sew them together, matching the notches. You do this by looking at the short sides of the rectangles that make up your belt. Find the pieces that have the same number of notches on the short sides and lay them face to face with the notches matching. Face to face means that the right sides of the fabric are touching each other. Use 1/4″ seam allowance to sew the pieces together. For most presser feet 1/4″ seam allowance will correspond to the edge of the presser foot. Remember to backstitch at the beginning and the end.

When you have all belt pieces sewn together, first press the seams flat and then press them open.

Pressing your seams flat first helps the top and bottom thread to meld together. The seam will look more crisp once you press it open, if you press it flat first.

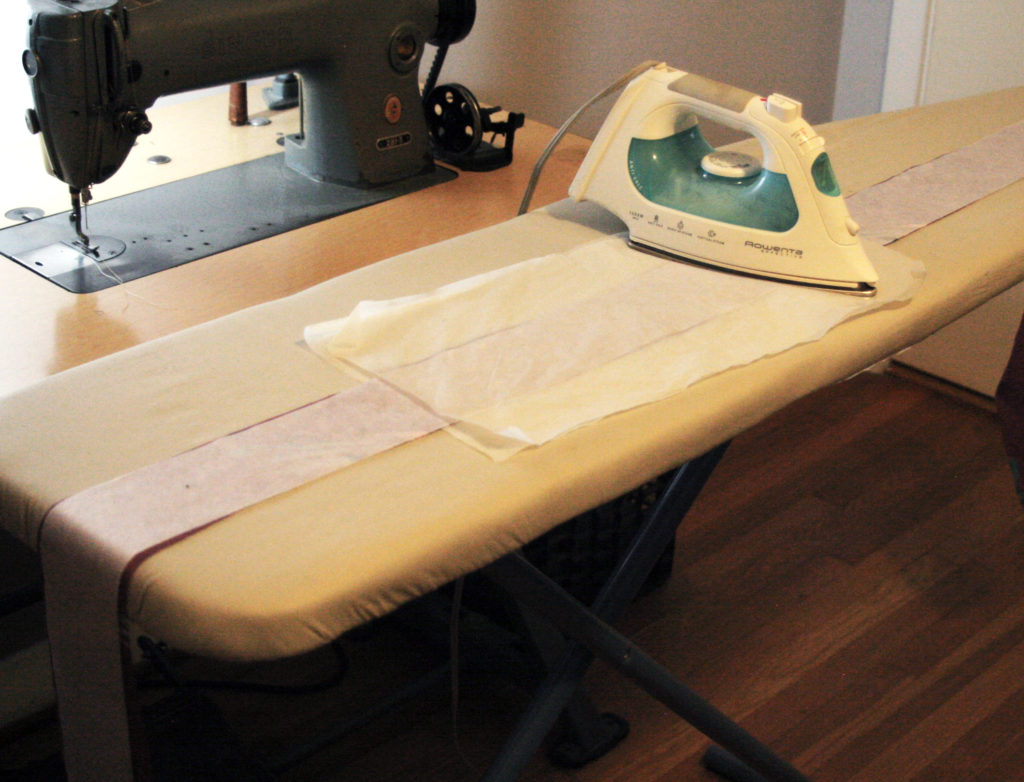
Now you can add your interfacing to the belt. Do this by laying the interfacing with the glue side* down onto the wrong side of the belt. Use a hot iron to adhere the interfacing to the belt. I like to use a Teflon pressing sheet to keep the glue from migrating to my iron. If you do this, just make sure to turn the steam off on your iron. The Teflon sheet will not allow the steam to go through and you will end up with a puddle if you forget to turn the steam off

*You should be able to feel little bumps on the side that contains the glue.

Wrap Skirt

Sewing Circle

A wrap skirt is a great beginner sewing project because it requires very little fitting and is flattering on many body types. This wrap skirt is also what is called a half circle skirt. This means that the skirt gets its volume by virtue of concentric circles. The outside circle is the hem and it is much longer than the inside circle which is the waist. Therefore when you straighten the circles to put it around your body the extra fullness at the hem undulates and creates beautiful fullness at the hem without any gathers. This is also how tuxedo ruffles work. This is the best example I could find in 5 min. on Google.

Materials needed:

2.5 yards light to medium weight woven fabric

1 yard light weight fusible interfacing

Wrap Skirt Photo

Me with my helper. She is very interested in the bow.

1. Prewash your fabric at least one time to allow it to shrink. I usually wash and dry twice. Use the washing machine settings that you plan to use in the future when washing this item and I recommend using the dryer even if you plan to line dry in the future. This is called “Prewashing” or “Preshrinking” the fabric. You will want to finish the cut edges to make sure they do not unravel while washing. You can do this by:

  •  Using an overlock stitch on your sewing machine
  • If you have a serger you can also use it to finish the edges before washing.

2. You can also prewash your interfacing even if it has an adhesive backing. Do this by soaking it in warm water and then lay it on a towel to dry with the adhesive backing facing up.

3. Press your fabric after it is completely dry. Do not press your interfacing if it has an adhesive backing.

Use one of the following cutting layouts to cut all the needed pieces. Notice that there are a different number of belt pieces depending on how wide your fabric is.

If your fabric is 60″ wide use the following cutting layout:

wrap-skirt-cutting-layout-60in-unfolded

You can also cut out the skirt with the fabric folded in half and then cut the pocket and belt separately with the remaining fabric unfolded. That layout would look like this:

wrap-skirt-cutting-layout-60in-folded1

Then unfold the remaining fabric and place the belt and pockets as shown below:

wrap-skirt-cutting-layout-60in-folded2

If your fabric is 45 in wide use the following cutting layout:

wrap-skirt-cutting-layout-45in-unfolded

Just like the 60 in. cutting layout, you can cut the skirt and 2 parts of the belt on the fold and then unfold the remaining fabric and cut the remaining pieces. That layout would look like this:

wrap-skirt-cutting-layout-45in-folded1

Then unfold the remaining fabric and cut the final belt piece and the pocket:
wrap-skirt-cutting-layout-45in-folded2

wrap-skirt-cutting-layout-45in-folded2